
Action cameras are no longer just tools for extreme sports fans; they’re storytelling machines. Osmo 360, which is DJI’s first dedicated 360-degree action camera, is built to capture immersive panoramic footage that can be reframed in post or edited to look like traditional action clips. It boasts native 8K 360° video, 120 MP panoramic stills, dual HDR 1-inch sensors, and up to 4K/120 fps in Single-Lens mode, making it a powerful choice for ski shooters who want cinematic Winter content directly on their phones or social feeds.
But shooting on snow isn’t the same as filming a lake jump or a desert ride. Snow throws unique challenges — from glare to cold battery drain. Here’s how you can tackle them and make footage that looks straight out of a highlight reel.
The extra gear you’ll actually need (and why)
Unlike traditional action cams, a 360 camera’s perspective depends heavily on where and how it’s mounted. DJI sells several Osmo-specific accessories, and each one enables a different style of ski footage.
Helmet mounts: If you want immersive first-person shots, you’ll need the Osmo 360 Third-Person Helmet Mount Combo, which includes a curved adhesive base designed to sit flush on ski helmets.
This isn’t optional. Regular flat mounts won’t adhere properly to curved helmets, especially in freezing conditions. DJI recommends cleaning the helmet surface, pressing the base firmly for at least 30 seconds, and waiting 30 minutes before use — a small step that prevents mounts from failing mid-descent. Helmet mounts are ideal for:
- First-person POV runs
- High-speed downhill footage
- Stable shots when you don’t want to hold a stick
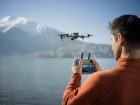
Invisible Selfie Stick: To get those “someone is filming me” shots, you’ll need DJI’s 1.2-meter Invisible Selfie Stick Kit. In panoramic mode, the stick is automatically removed from the frame, giving you a floating third-person camera effect. This accessory is key for:
- Rear follow shots
- Front-facing selfies while skiing
- Wide, cinematic angles without a cameraman
It’s also essential for transitions like Asteroid and Pushpin, which rely on vertical movement that’s nearly impossible without a stick.
Extra batteries and dry case: Cold weather drains batteries faster than most skiers expect. DJI recommends carrying two to three fully charged batteries. After shooting, storing the camera in a dry case (not a damp jacket pocket) helps prevent moisture damage from melting snow.
Cold weather prep: What to watch out for
- Keep batteries warm: Pack 2-3 batteries and keep spares in an inner pocket, and insert a fresh one about five minutes before shooting for optimal performance.
- Protect your lens and ports: Snow reflects intense light and can cause flare or glare if the lens is smudged. Wipe lenses clean with a soft cloth before every run. Also, make sure battery and USB covers are fully closed so snow and moisture don’t creep in — even a small breach can ruin electronics.
- Secure mounts: Whether you’re using a helmet mount or an invisible selfie stick, tighten all screws and locks. Fast descents and jumps can jostle hardware loose if it’s not properly attached.
Pro-level ski shooting tips
The real strength of 360 cameras is versatility. You can shoot once and choose angles later. But since gloves can slow you down, enable Voice Control or Twist Shot in advance so you can start filming without pressing buttons. That said, planning your capture style in advance elevates the effect:
1. POV immersion: Mount the Osmo 360 near the front of your helmet with a curved adhesive base. Lean into turns and keep the horizon level — this pulls viewers into your first-person descent. Tilting the camera slightly downward helps capture flying powder snow and adds dynamism to your shots.
2. Invisible stick third-person view: Using the 1.2 m invisible selfie stick or the helmet-mounted straight rod accessory lets you get third-person perspectives — essentially filmmaking without a cameraman. In panoramic mode, keeping the camera aligned with the stick creates that “invisible pole” effect in post.
3. Diverse angles: Try a front-hold selfie to show your face and skis, a rear follow angle for cinematic chase looks, and helmet mount for a raw speed feel. Switching between these in one ski run gives editors plenty of narrative variety.
4. Shoot wide and slow-motion: With the Osmo 360, you can shoot up to 4K at 120 fps in single-lens mode — perfect for silky slow-mo transitions on steep terrain or jump landings.
Fun tricks with the DJI Mimo app
Getting great footage is half the battle; how you edit it makes all the difference.
Subject tracking: After importing your pano clip, press and drag to select your skier in the frame. The app will lock focus and follow — this keeps attention on the main subject even if you reframe or stabilize later.
Motion blur: This tool turns ski speed into a palpable sensation. Add motion blur in the editor and fine-tune its range and intensity to match your movement.
Dashboard overlays: Sync recorded data from the Mimo app or a sports watch to overlay speed, gradient, heart rate, and distance. These graphics transform clips into performance stories.
Camera movement templates: Templates help you craft cinematic camera motions with a single tap. From subtle push-ins to dramatic pans, templates can instantly give your footage a polished look.
Reframing 360 footage: The real magic of a 360 camera is that you can choose your angle after you shoot. If you framed too high or low, don’t worry… Mimo lets you adjust in post so a once-in-a-lifetime descent can be shared in multiple perspectives.
Being creative isn’t just about angles; it’s about how clips connect. Here are a few standout techniques that you can try for eye-catching transitions:
Asteroid transition: Start a clip in a normal view and add a keyframe. At the end, add another keyframe with the “Asteroid” effect and adjust size/position to give that tiny-planet look. It’s a bold visual shift that feels cinematic and playful.
Pushpin transition: This illusion uses upward and then downward stick motion. In the editor, add a No-Distortion keyframe at the top and an Asteroid keyframe at the bottom, then loop them for repeated transitions. It’s a fun trick that breaks up your pacing and keeps edits dynamic.
Undoubtedly, the DJI Osmo 360 is one of the most capable 360 shooters you can put on your ski helmet this season. Its blend of high-resolution video, immersive capture modes, and app-driven creative controls makes it a compelling choice for both seasoned filmmakers and ambitious YouTubers alike. Filming on snow will always challenge your gear, but with the right preparation and editing techniques, you can turn cold, white runs into warm-feeling stories your audience will watch again and again.
More: Lowest ever: DJI Mini 3 drone deal slashes prices by $144
FTC: We use income earning auto affiliate links. More.


Comments