
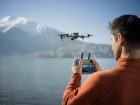
As of last week we are officially in summer, time for warm weather and vacations around the world, perfect for flying drones. Before you bring out your favorite quadcopter from storage, here are a few tips on what to do before your first flight.
1. Check battery health
The most crucial item to check is the batteries. Any signs of swelling batteries are not good and could result in damage to your drone, or even worse, to your house or someone else’s property in the field. If you notice any swelling, check if they are covered by your warranty and have them serviced or disposed of properly before flying. Order new ones as necessary.
Even if you don’t find any swelling, your drone’s app usually provides a tool to check your battery health. Here’s a great guide for DJI intelligent flight batteries that should help. This will inform you about the number of cycles your battery has been through and if you’ll get the full capacity it had when it was brand new.
2. Check for firmware updates
Now that we’ve addressed healthy batteries, let’s go over the more mundane tasks you should perform before flying.
Firmware updates should be easy to keep up with since your drone’s app will continuously prompt you until you update them. Keeping your drone up-to-date ensures that all security and safety features are current and allows you to access any new features that may have been released for your drone.
Look up how to update the firmware for your specific drone. For DJI and Autel drones, you should see a pop-up notification right away in the app after connecting the drone.
3. Give everything a once over (and clean)
Take this opportunity to inspect your drone for any damage that may have occurred during storage. Perhaps one of the kids took it out and dropped it or something fell on it. Who knows what could have happened over the winter? But you don’t want to discover a cracked arm when you’re 300 feet up in the air.
Finally, give your drone a thorough cleaning. The rotors will likely clear off any dust on the body, but dust on the lens tends to stick around. Use a microfiber cloth (9to5Mac has one, by the way) or some compressed air to remove it. Use something like this to give a gentle blow of air – avoid using a compressed air canister – and for all that is holy, DO NOT BLOW ON THE LENS.
If your lens is really dirty, use a wet lens wipe and then follow it with a dry microfiber cloth to ensure no streaks are left behind.
4. Double-check your local laws
This next tip may not apply to many of you, but there have been significant changes in local laws concerning drones. Whether or not you agree with these laws, it’s important to be an educated drone pilot and familiarize yourself with all the laws that pertain to you. Remember, laws are changed in committee meetings and courtrooms, not through arguments with law enforcement.
Make a call to your city clerk, county parks department, or local law enforcement to confirm that the area where you plan to fly doesn’t prohibit operating remote-controlled vehicles/aircraft (a vague statute in my city) or impose any other specific restrictions, such as the takeoff and landing of aircraft from city property (as seen in New York City). Additionally, double-check whether permits are required to commercially photograph any of those beautiful lighthouses or other buildings you wish to capture.
5. Take it out and give it a test flight
Now that you’ve completed all the necessary steps at home to get your drone ready to fly, it’s time to actually go out and do it. However, before taking it on your family vacation or to the beach, take it out for a test flight first.
Find a location with a wide-open field that isn’t too crowded. Use this time to get back into the swing of flying and ensure that every system on your drone is functioning properly. Especially take this opportunity to try out any new features that may have been added in the firmware update mentioned earlier.
The most important part to test is your SD card. While flying, take some test photos and videos to ensure that the card is large enough to hold an ample amount of data, fast enough to support smooth recordings, and free of any defects. The last thing you want is to be stuck in the wilderness with SD cards that are incompatible with your drone or to get back home only to realize that the SD cards have failed.
Finally, enjoy your summer, fly safely, and share your experiences!
FTC: We use income earning auto affiliate links. More.


Comments