
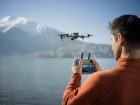
DJI sent me a brand new 04 Air Unit Pro along with their new DJI Goggles 3 and Remote 3 for review. I was expecting a small upgrade to their 03 Air Unit, and boy was I in for a surprise.
The 04, with it’s new features, is really good. So good, I ordered and paid for another Unit for myself. The quality of 1080p 100fps view, that you can now record in D-log at 60 Mbps at 4K up to 120fps, directly to the unit with an advertised nine mile range, that only weighs 32 grams, is pretty remarkable.
For the un-initiated, most fancy FPV Drone footage that you have seen on social media or on TV has at a minimum been shot with two cameras. A very light camera for the pilot to see through that, although much improved over the years, usually looks like crap when compared to our home TV, and at a minimum a much heavier action camera to record nature in its finest detail.
In racing conditions, with multiple pilots and a less than ideal track and/or locations, the image is often much worse. How some of these pilots manage to fly with such bad reception is borderline voodoo.
DJI is finally addressing this issue specifically, with the introduction of a new racing mode. It advertises latency’s as low as 15 milliseconds with up to eight pilots while still delivering a 1080p HD crisp image to the goggles.
Wiring and mounting
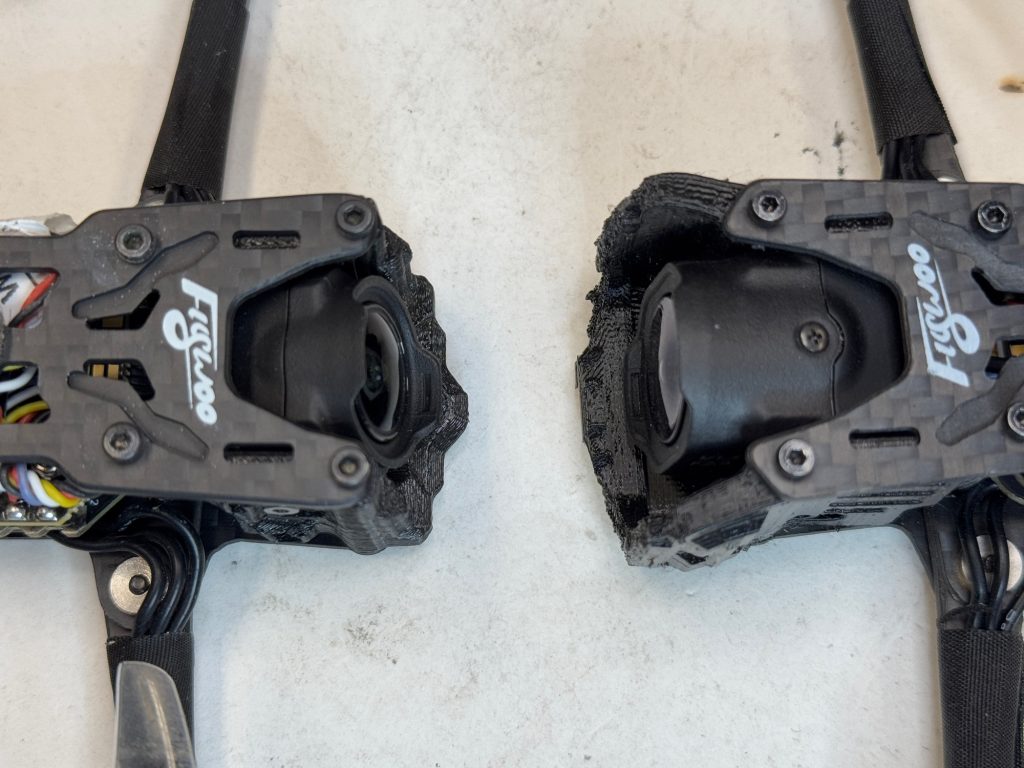
The DJI 04 Air Unit Pro rugged exterior casing, like its predecessor with some noticeable differences, and a couple annoying ones. The transmission module is wider and thinner than the O3, and the 04 camera is much larger to house the bigger sensor.
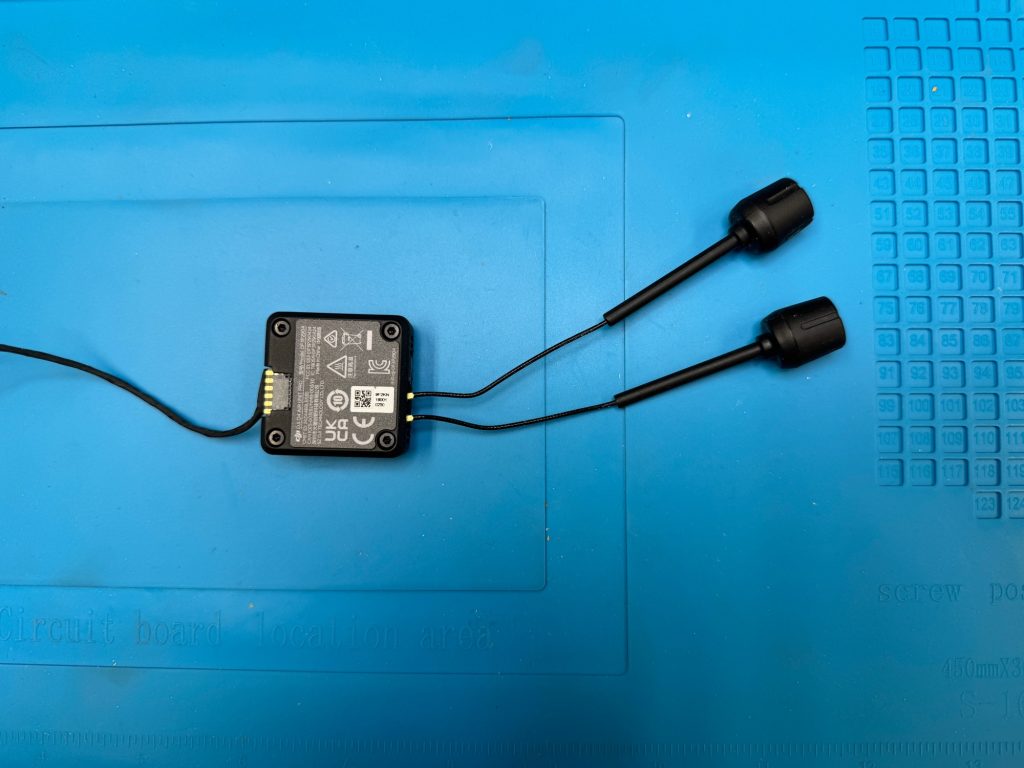
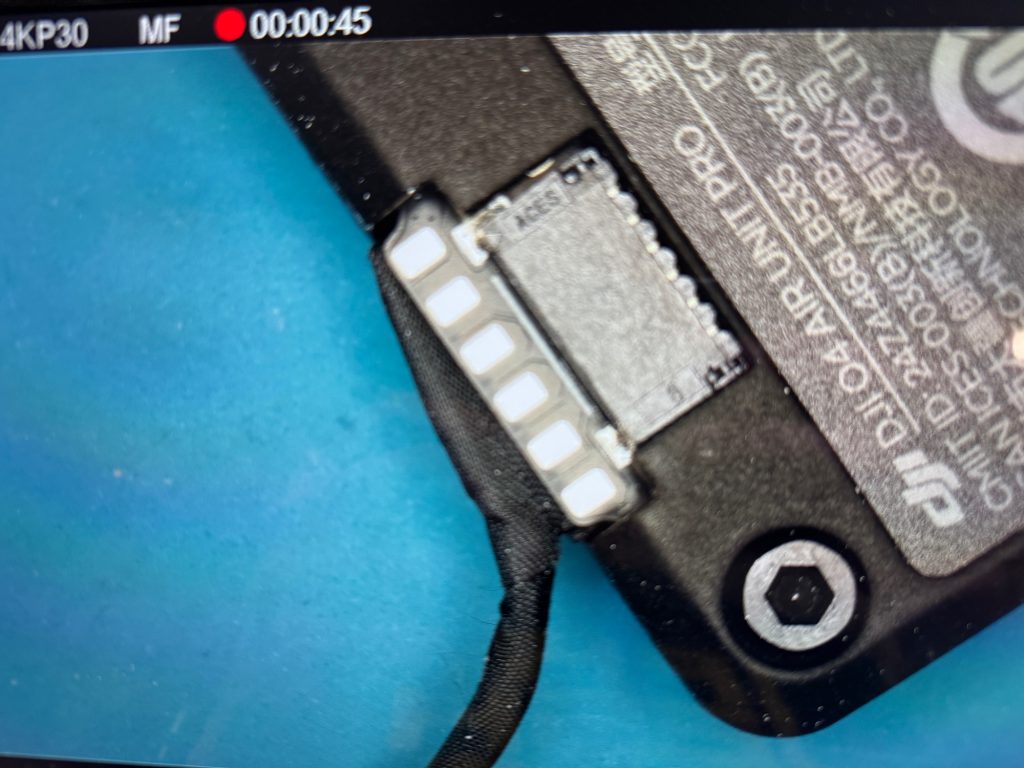
For the annoying bits. First, the asymmetry of the wiring compared to the 03. The cable out of the transmitter module to the camera comes out at a right angle from a fragile looking connector off to the side of the module. It’s the same thing with the antennas’ placement. Making for super awkward and tight installation in the smallest of frames. Especially those designed for the 03. I had to add some additional insulation to the pillars of the frame as they were contacting the base of both antennas. None of this is a problem on larger 5” quads.
The camera, being bigger, I 3D printed a new mount that was readily available online. You can use a site like Yeggi.com to search for a mount specific to your frame. The camera sticks out compared to the 03 but is well protected by the 3D printed part.
As for wiring, if you are only using the DJI remote, you have a modern flight controller with plug and play, AND the pins line up, it couldn’t be easier. you just plug in the provided cable, and that’s it for the wiring.
If, however, you have one of the flight controllers where the pins don’t line up, instead of soldering a half dozen wires on pads the size of ant heads, you have to gently lift the tinniest of plastic tabs to remove the wires and rearrange then. Full disclosure, I was only able to do this correctly without breaking and hot-gluing the remaining mess, after I purchased a proper soldering microscope.
This step could be made better across the board if flight controller designers could agree on the order in which the connectors are lined up.
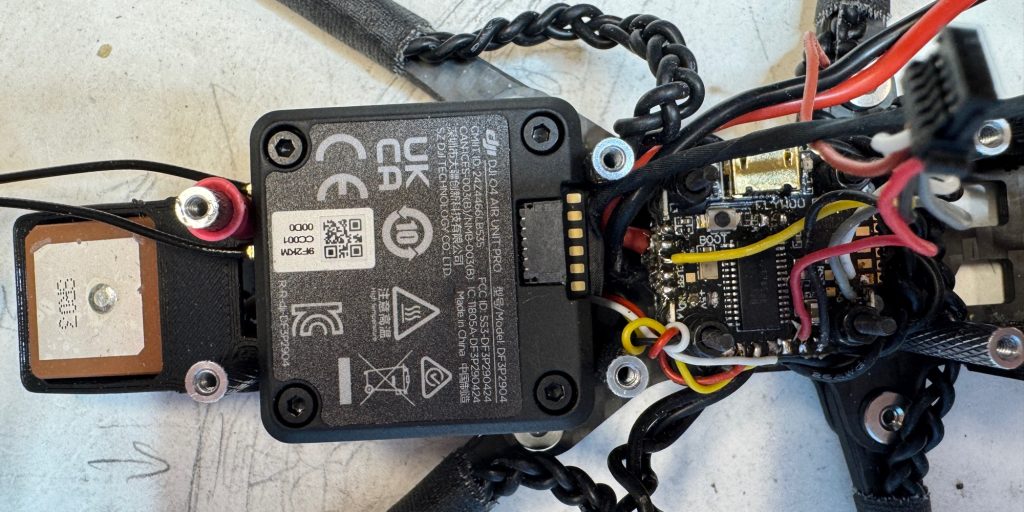
I finished my build with a GPS and completed my setup in Betaflight configurator.
If you have one of the fancy flight controllers with Bluetooth or Wifi, you can do the configuration on your phone with the provided app, wirelessly.
Because I wasn’t using a dedicated receiver on this build, and relied entirely on the DJI Unit, I made sure to set up my failsafe and GPS rescue accordingly.
Binding and linking
Unlike with the previous generation, where you had to bind the goggles 2 and remote 2 separately to the air unit, this time around you bind the Remote 3 to the Goggles 3 and then, bind the goggles 3 to the DJI 04 Air Unit Pro. You power up both your goggles and the drone. Press the power button on the DJI Goggles 3 until you hear a repeating beep. Then press the bind button next to the USB-C port on the DJI 04 Air Unit Pro transmitter. The light will blink red, and within a couple of seconds, you will hear a confirming beep and the light on the DJI 04 will turn a solid green. Both the goggles and remote should be linked to the Air Unit.
You will now see an icon in the goggles directing you to register your camera and update the latest firmware.
Firmware and registration
Your camera will not work until you register it to your DJI account. The process is pretty simple, You need to download and install, DJI Assistant2 (consumer drones series) app on DJI’s website, power up your drone, plug in the Air Unit USB-C to your computer, and make sure the cable is rated to transmit data. Login/create an account and register your individual DJI 04 Air Unit Pro to your account.
You can now update the Unit to the latest firmware; and make sure that the goggles and 04 Air Unit all have the latest firmware as well through the same app.
I have been able to disconnect the battery and update the Unit directly with the USB-C, but you have to have it powered up with your drone battery to register it. A little weird.
Camera quality and range
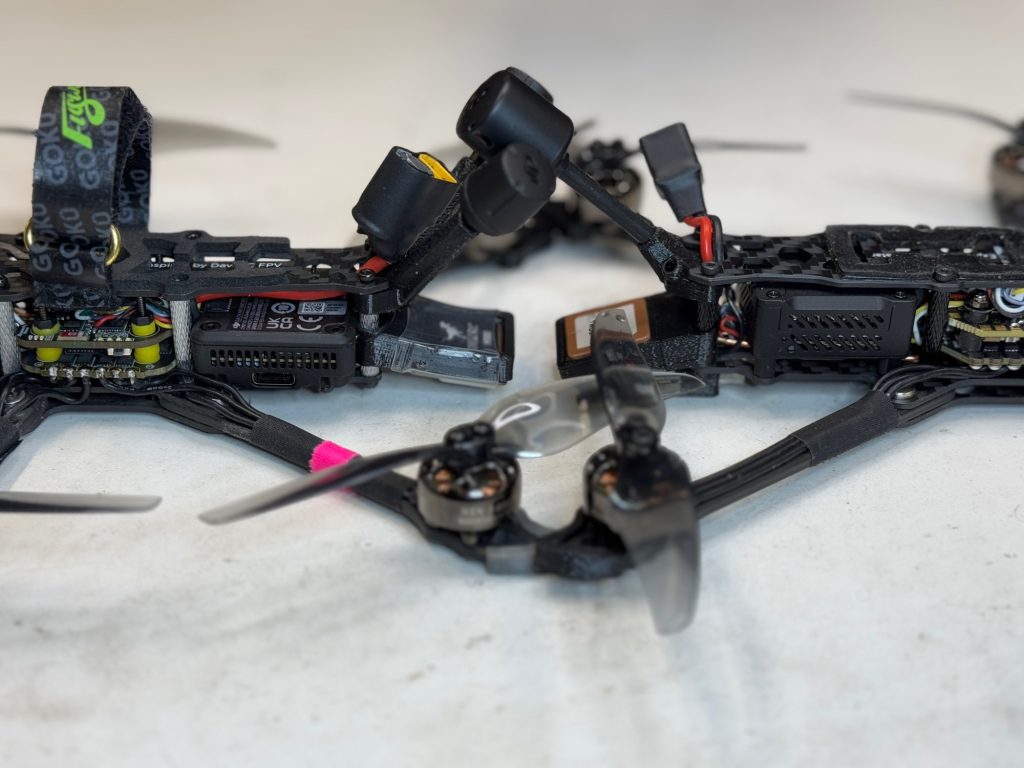
I’ve been flying with the new 04 for a couple of weeks now. To do a comparison test between cameras, I mounted the 04 Pro on to my old 3” long range explorer frame where I had the original 01 installed. I also have an identical frame set up with the 03, and a third with CADDX vista.
The quality of the image for an on board FPV camera is the best I’ve used so far. To have GoPRO-like quality in this small package is pretty amazing.

There are certain case scenarios where you will still want to strap on a GoPRO, but for the majority of the time not having to mount a dedicated GoPRO and the additional weight, means more flight time and agility.
The 04 Unit Pro comes with a 1/1.3” sensor vs GoPRO’s 1/1.9” sensor. But now you have access through the googles to 10-bit D-Log M color mode. With the addition of the available ND filters that fit both the 04 and Avata 2 drones, you can actually get some truly great looking footage without a dedicated action camera on your drone.

I also find the quality of the video in the goggles to be clearer and sharper with less compression artifacts than the 03.
As for the range…the 03 boasted 10 km vs the 04’s 15 Km…in ideal perfect conditions. Not having access to such an environment I settled for my neck of the woods…real world conditions. I found the quality of the image being better across the board. Whereas the 03 would drop below 10 Mbps in the same area the DJI 04 Air Unit was at 30 Mbps.The camera had much higher bit rates then it’s predecessor making the image look better than the 03 in all conditions I experienced.
The internal storage is limited to 4.45 GB, which is roughly one flight at 4K 48fps worth of recording but it does allow for a micro SD card to extend the storage. Just like the DJI 03 unit, you can access both the internal storage and the SD card through the USB-C to your computer.
DJI Goggles 3
To take advantage of all the capabilities of the DJI 04 you will need the DJI Goggles 3. Or the DJI Goggles N3. With these new headset you can enable Racing mode and manually adjust bandwidth options of 20 Mhz or 40 Mhz.
Another important difference for pilots is the field of view. It’s a lot smaller on Goggles 3 at 44˚ FOV vs 54˚ FOV on the Goggles 2. That’s quite noticeable and for my kind of flying, I personally prefer the wider view on the Goggles 2. I find them more immersive. Other changes are the Instantly noticeable two front facing cameras that allow for a sort of 2D video passthrough. There is a greyed out option in the menu for 3D pass through so we might expect that in a software upgrade in the future.
A video screen pops up, and takes over a significant corner of the already reduced field of view. It’s suppose to give you more awareness of your immediate surroundings, but, in my experience I found to be very distracting.
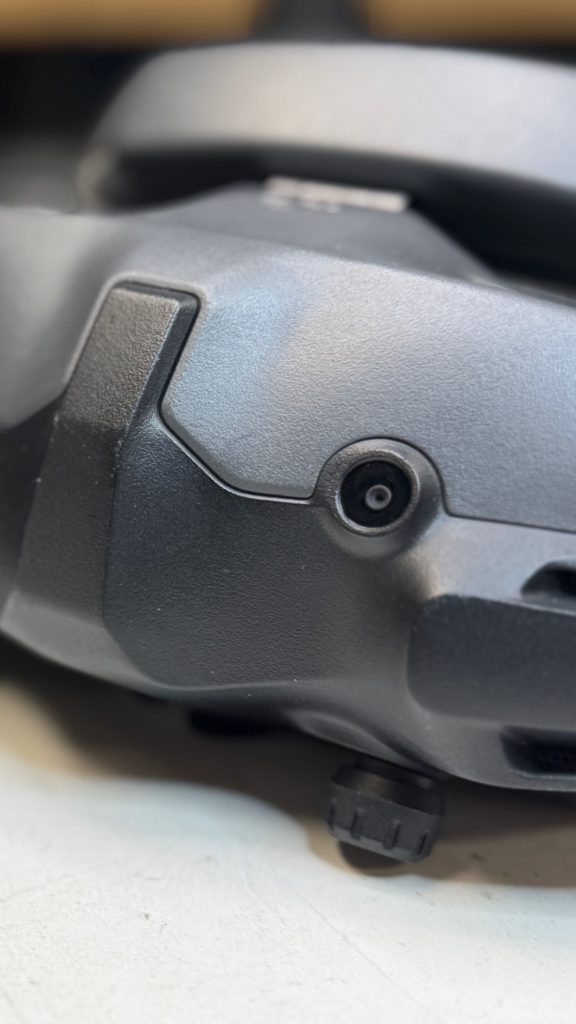
To activate this function, you have to tap the touchpad that has been moved to the left side of the goggles. Maybe if this function could be enabled in the remote? Or voice activated? But the very last thing I want to do while flying my FPV drone, is tap the left side of my headset.
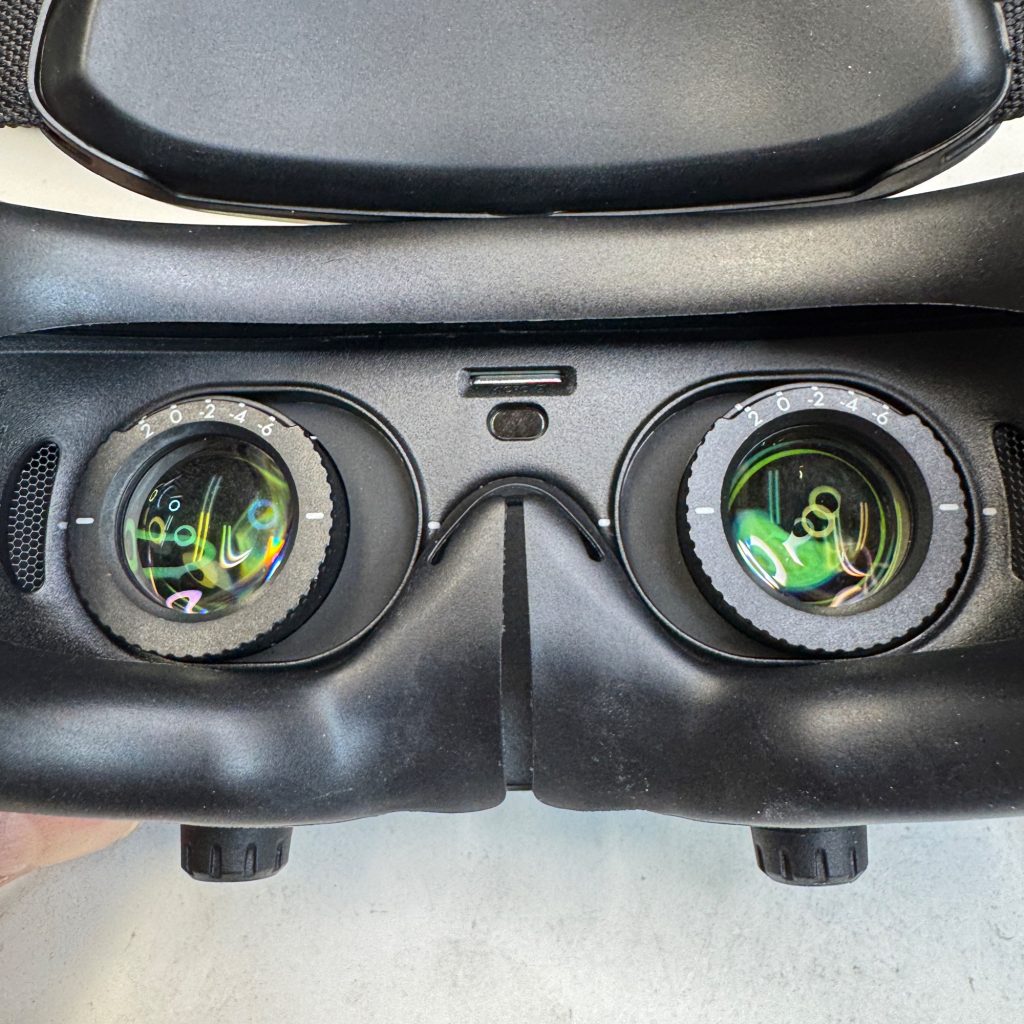
The micro SD card has been moved to the inside of the goggles, between the two eye pieces, instead of on the side like the goggles 2.
The adjustable diopters have lost a few degrees, from +2 to -8 on the goggles 2 to +2 to -6 on the DJI Goggles 3.
DJI’s new headset finally comes with an attached battery at the back of the strap. You cannot however remove it without taking it apart.
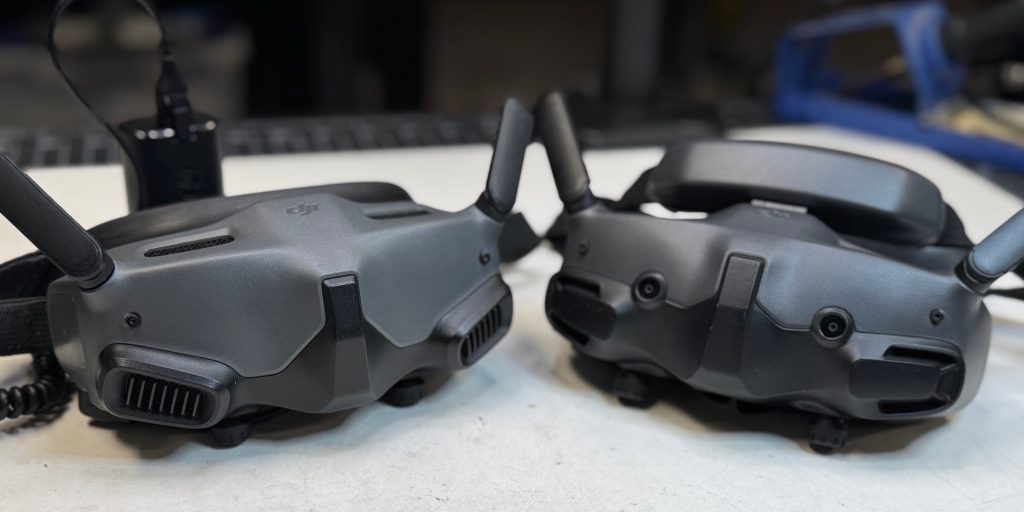
The maddening touch pad on the right side of the headset has finally been replaced with a much easier to use joystick and button. Also a re-introduction from the original version 1 headset.
Another new retro-addition, a new strap attachment point that is on your forehead. A design choice first introduced with the very first white headset DJI created. Unlike it’s wide and plushy brethren this new headset has a strip one inch wide and four inches long of plastic and a bit of foam on which the weight of the eyepiece of the headset rests on your forehead.
The headset is otherwise well balanced and you can adjust the goggles closer to your eyes by grabbing the – let’s just call it the forehead strap, and you have about 15 degrees of freedom to move the goggles closer to your eyes.
But sadly, you cannot flip them upwards. They do provide an additional piece of foam for the forehead strap but in my case with my Cro-Magnon brow it wasn’t particularly convenient or comfortable.
Because they are not spreading the weight on your face, the rubber around the goggles is a lot thinner, almost fragile compared to the goggles 2, but do provide excellent light blockage when fitted properly.
The goggles also come with an included de-fogging fan that you enable through the menu options. Which are simple easy to access and quick to use. The layout is similar to the previous versions.
Unlike the Goggles 2 you cannot pop off the antenna of the goggles 3, making replacement of the stock antennas a little more involved as you have to take the unit apart.
There are no HDMI outs on the goggles 3 just like the goggles 2, just a USB-C port. You can however broadcast your session through the goggles to your mobile device, and through your mobile to a video streaming device or a TV. If you already have the DJI RC Pro controller, you can plugging the USB-C from the goggles into the controller, and use the remote’s HDMI out to connect to a TV or other streaming device.
Alternatively you can use Cosmostreamer to get HDMI out of your Goggles 3 as well as the Goggles 2.
DJI Race Mode
A great new addition for Freestyle and Drone Racing pilots is DJI’s new race mode. instead of spreading a signal all over and being a general nuisance in a racing environment. DJI new feature, allocates the channels to race band R1 through R8, improving latency and manual adjustments to improve the signal in a drone racing environment.
For Freestyle you can manually set the transmission power and bandwidth to higher frequencies, while in a Drone Racing environment, where making sure one pilot’s equipment doesn’t interfere with another, you can limit the transmission power to 25 mw and make individual power adjustments for each pilots through the goggles to make sure no one interferes with one another.
I was not able to test how well this works in racing environment with other pilots yet, but this look super promising.
Other things to consider when switching to race mode, the maximum video transmission bitrate is lowered to 10 Mbps from 60 Mbps and the view and DVR recording is limited to 4:3 aspect ratio. You cant switch back to 16:9 or record 4K in Race mode.
DJI Remote 3
Because the DJI Remote only has to communicate with the goggles that are within feet of it, the unit is extremely light, but not toy like. It has the exact same quality build, button, and switch layout as its predecessor.

The button and switches are wide, easy to access and won’t break when thrown in a backpack or bag. The gimbals are smooth and you can fine tune the spring backlash with the screws accessible through the back under the grips rubber pads.
I love its small size and weight and, short of running out of switches, super convenient to pack, and use. I do wish that DJI would create a dedicated remote for FPV pilots that would replace some of the buttons with additional 3 position switches though.
The buttons just don’t give any physical or visual cue as to what position they are in. With the advance of more features in the new flight controllers it would make the remote more practical and convenient to use.
Final thoughts
The DJI 04 is my top choice for any new build today. And I absolutely recommend it as an upgrade to the original Air Unit or an old CDDX Vista Pros system. The differences are huge.
It’s a bit more complicated if your happy with your 03 Air Unit Pro and you already have a GoPRO like camera attached to it and you aren’t bothered by the shorter flight times and added weight.
I wish in Race mode the camera could display a 16:9 image, and have the option to be able to record in 4K at different frame rates. This would be especially useful to freestyle pilots or those that need low latency and to record their flights without having to strap on GoPROs to their drones.
It would be fantastic if DJI reintroduced the HDMi in/out to the goggles. Having a direct HDMI out of would simplify a lot of things with sharing and racing conditions.
There is some exciting development in the open source community around HD transmission system, but until these fully mature there is no better camera, of this quality, weight and price range on the market right now.
FTC: We use income earning auto affiliate links. More.

Comments